Lordrush Cesares Fury Guide: Turn a Stamina Trap into a Jackpot
Interested in being a guide contributor? Let us know.
Cesares Fury is a deceptively simple event in Lordrush, yet it remains one of the most misunderstood by the player base. While many see it as a "stamina sink," savvy players and well-coordinated alliances recognize it as a premier opportunity to secure Mythic General Hero Shards, Truegold, gems, and speedups.
If you or your alliance members are unfamiliar with the underlying mechanics, particularly regarding stamina efficiency and reward distribution, you are likely leaving high-value loot on the table. This guide breaks down the event into two critical sections: the Individual 50-Stage Journey and the Alliance Boss Phase, providing you with the mathematical and strategic blueprint to maximize your gains every time the event appears.
Just need the essentials? The Cesares Fury event page has the stage milestones and rewards at a glance.
1. Event Overview: The 3-Day Window
Cesares Fury is a recurring event that lasts for three days. It is structured into two distinct but overlapping parts:
- Individual Missions: A series of 50 progressively difficult stages each player individually completes.
- Alliance Bosses: Collective challenges unlocked by the alliance’s progress in individual missions.
Success in both parts is heavily influenced by how well your alliance coordinates help and how effectively you manage your stamina.
2. Mastering Individual Missions (Stages 1-50)
The core of the event is the 50-stage gauntlet. For new players, this can be a massive stamina draw, but there are several ways to optimize your path through these levels.
Choosing the Correct Difficulty
Every time the event arrives, you must select a difficulty level for your individual missions. On your first attempt, you will only have Easy mode unlocked. Clearing all 50 stages of a difficulty unlocks the next tier (Normal, Hard, Master, and finally Insane) for the next event cycle.
The Strategy: Always choose the hardest difficulty available to you. Even if you suspect you cannot complete all 50 stages, the rewards at higher difficulties are scaled so aggressively that a partial completion of a higher tier often yields more orange shards and resources than a 100% completion of a lower tier. If you get stuck, remember that help is always available through alliance rallies or Accords.
Even if you don’t feel like the rewards are that great for clearing the first difficulty, they scale nicely into higher difficulties, which means each future Cesares Fury event will give you better rewards per stamina spent if you take the time to advance through the first few difficulty levels.
The Scouting and Attacking Loop
- Scouting: It costs 15 stamina to scout a Cesare and make him appear on the world map. This cost is fixed and cannot be reduced by hero skills.
- Attacking: Once a Cesare is discovered, you must spend additional stamina to defeat him. You can choose to attack via a solo march (10 stamina base cost) or by launching an alliance rally (25 stamina base cost).
- The "Unwinnable" Solo Trick: You can often defeat Cesares that are far above your recommended power rating. By using heroes with high upside chance-based abilities, such as Isabelle, you can "roll the dice" on solo attacks. Because stamina is 100% refunded on defeat, there is zero risk in attempting to solo a Cesare multiple times until your hero abilities trigger perfectly for a win.
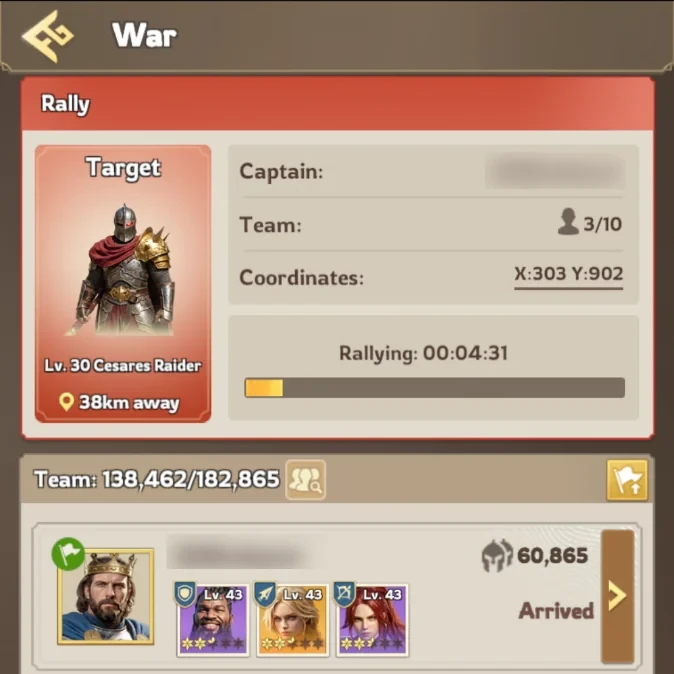
- Joining Cesare rallies: whenever your alliance members form rallies to clear their Cesares, you can get joiner rewards for up to 50 rallies per day. This is a separate joiner rewards pool from the regular Terror or Dreadwolf rallies you can join.
Stamina Efficiency with Thora
Stamina is the most precious resource in this event. To conserve it, you should include Thora in every single solo march or rally you lead.
- Her Iron Constitution skill reduces the stamina cost of marches by up to 20%.
- This reduces the cost of a solo attack from 10 to 8 stamina, and a rally from 25 to 20 stamina.
- Over the course of 50 stages, this can save a governor between 100 and 250 stamina, which is effectively "free" resources.
One more note on Thora: Remember that she does not have any expedition combat abilities and has lower expedition stats. So if you get to a point in your solo marches where you cannot advance further, before spending the stamina on a rally with Thora (20 stamina), try to substitute her for a hero like Cyprus for a chance to clear it with a solo march (only 10 stamina).
If you want more advice on building Thora efficiently, then check out the Desert Trial Guide, which covers her signature event.
Cesares on stage 10, 20, 30, 40, and 50 are also tougher than the Cesares from nearby stages. So if you are stuck on e.g. stage 20 and need a rally to clear it, you might be able to still clear stage 21 with a solo march and save more stamina.
Finally, you do not need to rush the event. Spread your 50 stages over the entire 3-day window to avoid depleting your stamina reserves in your backpack all at once, as you may need that stamina for other simultaneous events.
3. The Optimization Puzzle: Cesares Accords
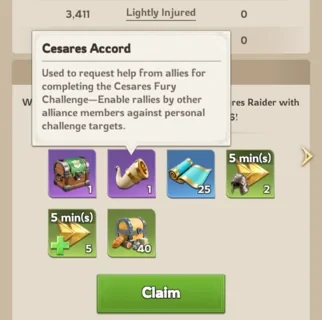
The Cesares Accord is an item that allows you to request help on an individual stage. While the game positions these as "lifelines" for when you are too weak to progress, they can be repurposed as powerful tools for alliance reward optimization.
Why You Should Always Use Accords
At the start of the event, every player receives five Cesares Accords.
- Zero Reward Loss: If you use an Accord to have someone else beat a stage for you, you receive the exact same rewards as if you had beaten it yourself. This is even true if you do participate in the rally. This includes the bonus orange shards awarded on missions that are multiples of 10.
- Stamina Savings: Using an Accord saves you the stamina cost of attacking the Cesare yourself.
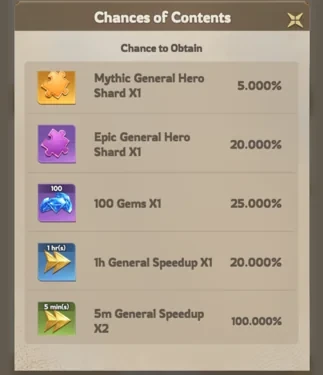
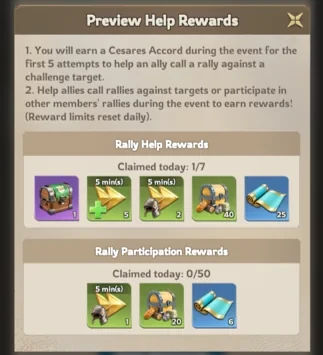
- The "Helper" rewards: When you beat a Cesare for an alliance members who used a Cesares Accord, you get excellent rewards for the first seven times you do so each day. This includes the Cesares Aid Chest, which has a chance to drop Mythic General Hero Shards, gems, and speedups. Additionally, for the first 5 times you help an ally by rallying their Cesare, you will get another Cesares Accord as a reward.
The Optimized Helper Strategy
To maximize alliance-wide rewards, your alliance should follow these rules for Accords:
- Use all 5 Accords: Even if you can solo every level, using Accords allows your teammates to earn Aid Chests.
- Don't Join Your Own Accord Rallies: If you use an Accord, do not join the resulting rally. It doesn’t change your rewards at all, but leaving the slot open allows more teammates to join and earn rewards for themselves.
- The 7-Time Limit: Only help others with their Accords up to seven times per day. After seven, you no longer receive the high-value Aid Chests. By stopping at seven, you leave opportunities open for other alliance members who haven't hit their cap yet.
4. Alliance Bosses: Prepare for Drama
As alliance members progress through their individual stages, they unlock Boss Cesares that the whole alliance can attack. These are the biggest sources of rewards in the event, but they are often the site of massive alliance friction due to "over-attacking".
The Damage Myth
The most important rule of Boss Cesares is that your rewards are not based on damage dealt.
Whether you deal 90% of the damage or 0.01%, your rewards are drawn from the same randomized loot table. For instance, a player who sends a single march of one troop (0.00% damage) to five bosses can receive four orange shards. Meanwhile, high-damage attackers in the same alliance may receive only one or two orange shards.
The problem is that unless Lordrush players are well-informed in advance, they may mistakenly try to defeat the boss as quickly as possible and incidentally deprive their teammates of rewards. This is where tempers will start to flare, so alliance leaders need to proactively manage this before it happens through coordinated team play.
How to Coordinate the Boss Defeat
To ensure every member gets a share of the loot, alliance leaders should establish strict ground rules:
- Timing: Only summon bosses when a large number of people are online (e.g., right after Bear Hunt). Set a time in advance as if you were doing a Bear Hunt or Viking Vengeance invasion.
- The Single-Troop Tag: Everyone should send a single march of one troop to "tag" the boss. This gives you full credit for the defeat once the boss eventually falls. Once players have tagged the boss a single time, they should not send any more marches.
- Wait for the All-Clear: Once everyone has had a chance to tag the boss, the alliance leader should wait until no more marches are incoming before giving the "all-clear" to fully defeat the boss and move to the next one.
- Managing Rogue Members: There will always be rogue members who don't read chat and attack with full marches, killing the boss too quickly. Kicking them from the alliance will stop them from being able to target the boss Cesare that is up. (It will also get their attention too if they haven’t been following chat!)
In general, the theory of leaving Cesares bosses up for hours so everyone can tag them is a bad idea. Without alliance leaders actively managing the bosses, someone will mess it up. And it only takes 1 out of 100 alliance members to ruin it for everyone, so the statistics are not on your side! Instead, it is better to go through the boss Cesares all at once when alliance coordination is at its highest.
5. Summary: The Cesares Fury "Cheat Sheet"
To transform this event from a stamina trap into a jackpot, follow these five golden rules:
- Rule 1: Always select the hardest difficulty unlocked.
- Rule 2: Use Thora for every single solo march and rally possible.
- Rule 3: Use all five Cesares Accords to help your alliance mates get Aid Chests, but don't join your own rallies they make with them.
- Rule 4: Aim to help with at least 5 rallies for other players during the event. You will “get the stamina back” if you use the Accords you receive for your help. (Just be sure not to exceed 7 per day or you waste the rewards.)
- Rule 5: On alliance bosses, tag with one troop and wait for everyone. Remember: damage does not equal better loot.
By following this framework, you can consistently secure Mythic General Hero Shards in one of the few places in the game where stamina can be directly exchanged for this rare currency.